Showing posts with label Kona Bay. Show all posts

Friday 23 August 2013

Clover Clamshell Accessories Case

Clover Clamshell Accessories Case
I am still enjoying doing a few small projects, for a quick quilting thrill.  Today I am sharing my Clover Clamshell Accessory Case.  This is a neat little purse which opens and shuts by squeezing the ends.  It shuts quite firmly, so it is ideal for carrying small pieces of jewellery when you are away. When I was fabric shopping in the USA at Cottonwood Quilts, Hutchinson, Kansas, there was a sample on the counter of one of these, which looked so cute that I had to throw one of the kits in to my purchases that day.
Clover Clamshell Accessories Case - Small, Medium, Large
The template kits for these little cases are sold by Clover.  They come in three sizes: small, medium and large.  In the kit are the instructions, three heavier weight plastic outer templates, and three lighter plastic inner templates.  I have to admit, that when I bought it I expected it to be a template which you could copy and use again, but they are sold as the actual templates, or forms.  With a bit of research I have discovered that plastic covers from notebooks, and various weights of acetate sold at stationers will do a similar job.  Like a clamshell, the case snaps shut with the flex in the plastic, so getting the right weight is quite important.

Cutting Fabric for Clover Clamshell Forms
The fabric needs to be cut around the templates with a 1/2 inch seam allowance, as the seam is gathered taut around the form template, and the inner which is slightly smaller.
Sticking wadding to plastic templates - Clover Clamshell Case
To add softness to both the inner and outer plastic forms, you stick on some wadding.  Luckily, I had just trimmed a quilt, and these little bits were just the job.  Being patient, I left them overnight to dry, and then trimmed them exactly the next day.

Lacing fabric around Clover Clamshell Plastic Templates
Next, you stitch a running stitch around the edge of each piece of fabric, with a long, strong thread, which will allow you to put in the template (wadding facing down on the back of the fabric) and gather the seam allowance around it.  Without cutting the thread, you then need to lace the seams together to make the fabric taut around the form. It is a bit fiddly at the points, but don't fret too much, as it won't be seen.
Stitching the outer and inner templates together, with the help of Clover Wonder Clips
With the inners and outers covered, pair them up, wrong sides together.  With the wadding, gathers and plastic, they are quite bulky, so using these little Clover Clips is a neat way to keep them in place whilst you sew them together.  Match up your thread, and using your neatest ladder stitching, fix the inner to the outer, so they become a single side.

Squeeze Opening - Clam Shell Accessories Case
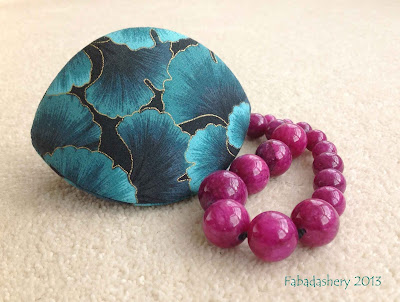
The final shape is like a three-sided rugby ball, so the three flat sides need to be manipulated and sewn to become three-dimensional.  The first two sides are easy enough, but the third, in particular,needs good stitching as it is being done under tension and will have to sustain that tension during its lifetime.The fabric I have chosen for the outside is a jade Ginkgo Tonals by Kona Bay Fabrics, and the inside is a matching colour with a subtle metallic dot.

Clover Clamshell Accessories Case for Jewellery

Joining up with Whoop Whoop Friday! and Crazy Mom Quilts.